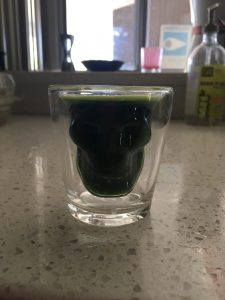
Loved it, hated it? My husband is really fine with the flavor. Me? Gag, not so much. Even with these adorable skull glasses, I am still nonplussed with the flavor. No, I realize how freaking healthy it is to do, how the mineral content can even change gray hair back to your natural colour, so I force myself to shoot it down. Because it is so detoxing and works quickly, some people can feel a bit nauseated after a shot of the magic green. I feel fine after getting it down….it’s the getting it down I struggle personally with. With my Hippocrates Training I learned a few secrets lately to help get the best mineral and vitamin content as well as the best (ahem) flavor.
Growing your own wheat grass is going to be, by far, the least cost and the freshest. One way is with organic soil in a 10×10 Tray with 1 cup of wheat grass and about 1/2 inch of soil. After 3 days of soaking and rinsing them, it take about 7 days for the grass to be ready. If you go this route, with soil, you will find that most of it gets absorbed by the plant so its really not as messy a process as what I was initially envisioning when I decided to go hydroponic.
I use the Prodyne appetizer tray to grow my Wheat Grass. This system can also be used for Mung beans and Sunflower sprouts. For the mineral content, I use SeaCal fertilizer in my water mixture as I am not using any soil. You should get about 4-6 shots out of this method depending upon how much wheat grass seed you lay down. This may mean that you, as I did, purchase 3 or 4 appetizer trays so you always have a rotation going. You will have the best results using just one layer so I began using 2 cups, per tray, but now I have less yield, less dense but better overall results with 1 or 1.5 cups of seed. NEVER place ANY sprouts you are doing in direct sunlight. For Wheat Grass, it will turn bitter and that absolutely isn’t good for anybody (Think bitter beer face).
Instructions as follows:
Step 1 – Germinating the seeds
Day 1 Rinse seeds and place in container, cover with 3xH20 and soak 12 hours.
Day 2 Drain and rinse and soak another 12 hours.
Day 3 Drain rinse and soak a third time 12 hours.
The seeds expand which helps germination, hastening sprouting and minimizing mold.
Day 4 Drain and rinse a final time.
Step 2 – Line the bottom of your tray with paper towels (you can cut them to size) This helps to keep them from falling through the tray vent holes.
Step 3 – Lay down your layer of soaked seeds.
Step 4 – Fill the appetizer dish with water
Step 5 – Spray them morning and evening with water. I like to add a 1/4 tsp of baking soda which helps inhibit mold. If you do end up with a bit of mold on the root system, that can be rinsed off. You are cutting above the root line anyway.
I like to add just a bit of water to my appetizer tray at the beginning, then toss it and renew with the vitamin water (adding the SeaCal)
In a few days, you will see a green blade appearing. In about 7 days (after placing in the tray) you should see the joint or where there is the very beginning of a new leaf coming up after the first original blade. NOW is time to harvest, the grass is at its peak.
So the key things are 1) Never direct sunlight. Your kitchen counter is perfect. 2) Spray 2x a day 3)You want it to be the very freshest which means growing it yourself is best and finally 4) Harvest at the beginning of the joint, once you see that 2nd blade begin to pop up, harvest the entire tray! Keep it in a bag in the fridge, keeps for a week or get a green grow bag for nearly double the life.
Let me know please if I can help answer any questions too. When I first began this journey I had a plethora of them and am still learning as I go along. Cheers!
